
Kodi for Chromebook
Chromebook is nothing but a laptop which runs on the Google Chrome operating system. This laptop can be used while being connected to the internet as most of the application software and documents are stored in cloud storage system. This thing makes it lack in storage onboard. These laptops are found to be available at low prices and long battery life too. The Chromebooks are specifically made for running Google apps which includes Gmail, Google drive, calendar, and much more. Today, this article is going to help you in providing the step by step procedure to install Kodi on chromebook. As we know, Kodi is a fine Online streaming software, the combo of Kodi and Chromebook can entertain you much.
How to install kodi on chromebook?
Before starting the installation process of Kodi on your Chromebook, make sure you have installed Linux on your device for the further process.
Step 1
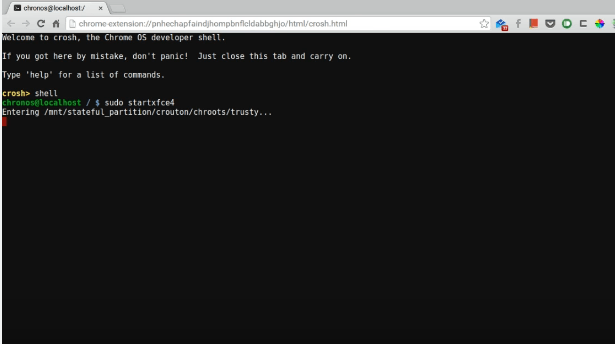
The initial step of installation has to start by opening the terminal. For opening the terminal, you have to press CTRL+ ALT + T. This thing will open up the terminal. Once you open the terminal, you can see a thing called “crosh>” in there you have to type “shell” and click enter. After doing so, you could get the “chromos@localhost / $” thing. In that, you have to type “sudo startxfce4” and click enter.
Step 2
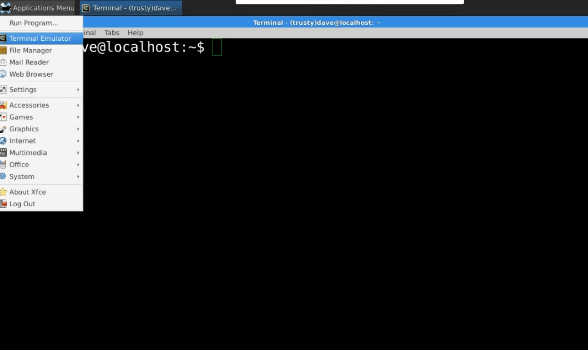
After doing the previous process, you have to open the Terminal emulator. For this, you have to click on the Application menu. In that, you can see options like run, terminal emulator, file manager and much more things. In these options, you have to click on the Terminal emulator to open that thing.
Step 3
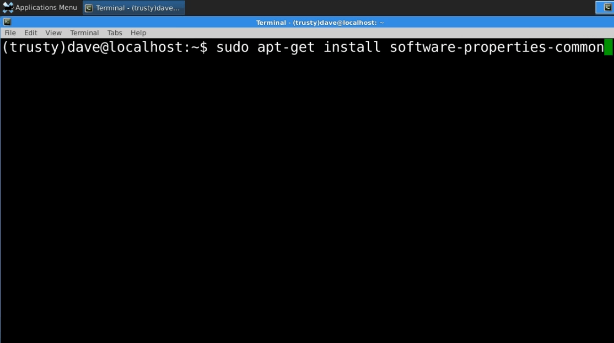
Once you open the terminal emulator, you will get the screen as if shown in the above image. It could show you the localhost thing. In that location, you have to enter the command as if “sudo apt-get install software-properties-common” in that location and press enter.
Step 4
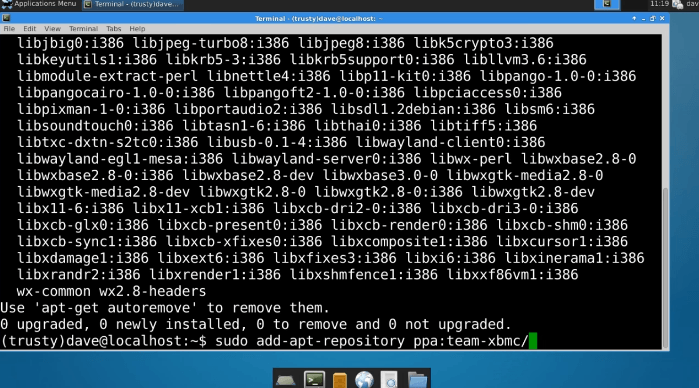
Once you press enter after typing the mentioned command, you get the screen as if shown in the above image. Below all these things, you have to enter the command as “sudo add-apt-repository ppa:team-xbmc/ppa” and click enter.
Step 5
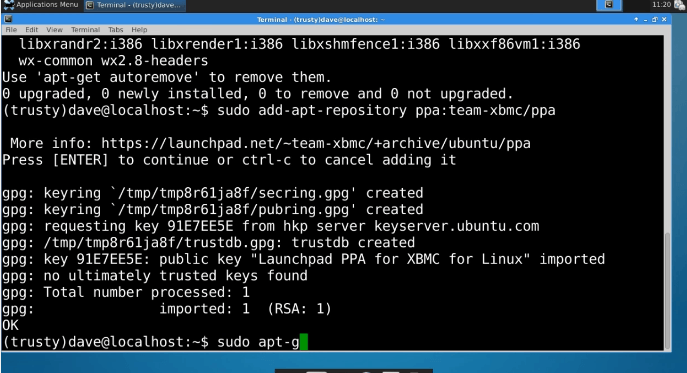
After you press the enter button, you will get the process being done and will once again show you the local host where you have to get into the command as “sudo apt-get update” and once again press the enter button to access the command. The moment you press enter, it will take a few seconds to process the command.
Step 6
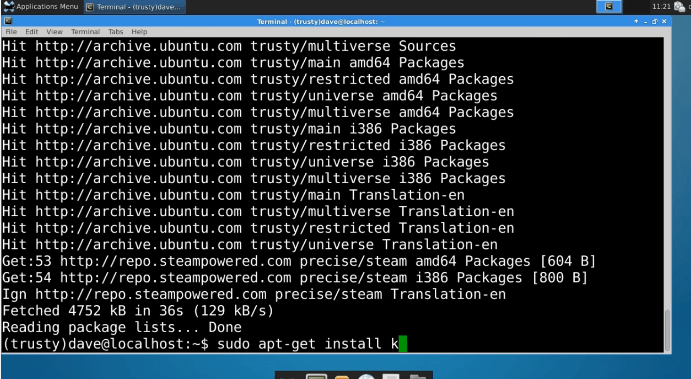
After that, you will get the screen as if shown in the above image. In this, you have to type the command as “sudo apt-get install kodi” and press the enter button.
Step 7
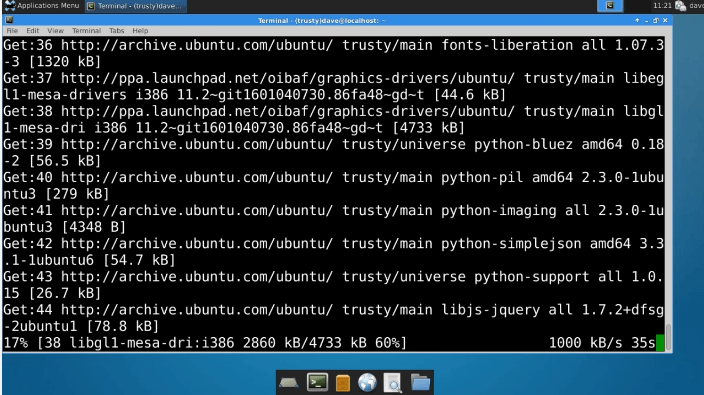
Once enter the command “sudo apt-get install kodi” as if mentioned in the previous step, you can see the downloading process on the terminal screen. You have to wait until the whole download process getting finished.
Step 8
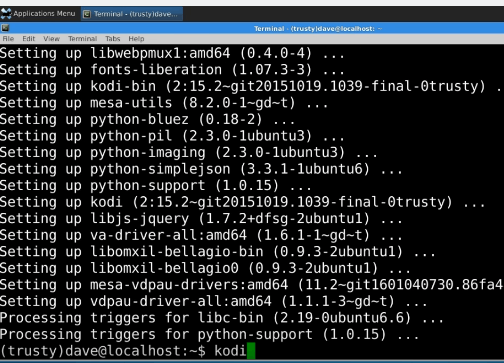
After the download process gets over, you have to enter the command “kodi” and press the enter button. That’s it; this process will install the kodi application on your Chromebook.
Step 9
Thus, it will launch the kodi application on your Chromebook, and you will get the home screen of Kodi which is illustrated in the above image.
Conclusion
This procedure is the shortest process for installing kodi. Kindly make sure that you enter the proper terminal commands as mentioned in the steps for the proper installation and working. By reading this article, you will feel the simplicity of installing the kodi on the Chromebook.
I went to Kodi forum, posted question about issues getting 3rd party ADD-ONS no loading and was booted out for this. Maybe you can help. I’m using Kodi 17.6 on Chromebook and want to setup MXPlayer as default but first I need access to Downloader program/app however can’t figure out how to get it onto Chromebook. Fire TV Stick, no problem but not so on Chromebook. Seems Chromebooks are hybrid between Android and Windows meaning neither work well, they don’t play well with each other especially when need to say, move downloaded APK or ZIP files to where Kodi can see them. Any advise.