
Contents
What is Ororo TV?
Ororo TV is a web application where we can find the best TV series in their original version with subtitles. If people want to watch television series in their original version and if you want to learn another language, it is the best time to go for a perfect option called Ororo TV. In this website, you can watch series online with subtitles. It is simply a comfortable way of enjoying your favorite series from your system without having to download files or search for subtitles. It offers a very interesting service. We do not have to download set and find subtitles. We only have to access Ororo TV, search for the series you are watching, and you will be able to play it with its subtitles. The Ororo TV Kodi add-on is designed to provide varieties to watch. There are many TV shows from different sources. Few of them are not traditional TV channels, but there are great choices available. The one condition is to use this add-on that you need to have an Ororo TV account. An Ororo TV show has a limit of two episodes per day under a free account.
Features of Ororo TV Kodi
- Here are the features of Ororo TV Kodi add-on are as follows,
- Ororo TV supports for watching movies through Ororo.
- Has added subtitles for movies.
- The movies of Ororo TV have metadata information.
- It has a paginated list of movies.
- It adds the ability to clear cache to fix any script error.
- There is an updated notification if the movie fails to play.
- Can find and fix playback bugs.
- To use the Kodi Ororo Tv add-on, we must register for an account.
- Paid accounts get to watch an unlimited number of streams every day.
- It contains multiple subtitles for a different We can change these languages by pressing the subtitle button in the Kodi remote application and by selecting the subtitles button in your playback menu.
- It allows searching for series by genre or country.
- We can connect Ororo TV with your social networks and can share series.
- It lets you enable and disable subtitles.
How to create an account for Ororo TV?
Here we are going to show the steps involved on how to create an account in Ororo TV Kodi add-on and the installation process of Ororo TV which is the best TV series in their original version with subtitles. Before opening, start the work usually by refreshing data. Refresh would make the installation process very smooth without interruption. Steps to create an account for Ororo TV and then install Ororo TV on Kodi.
- Select the web browser. Here I use “Google Chrome.”
- Type the address as “Ororo.tv” on the address bar.
- Go to the “Log in” at the top right corner of the website.
- Select Sign up option.
- Enter the Email address and password as you like.
- “Activate your account”- pop up message at the top of the website.
- Go to your Email account and confirm.
How to install Ororo TV Kodi addon?
Step 1: Open Kodi application to install Ororo TV in Android box. You can use a laptop, desktop, and also mobile phones as per our convenience.
Step 2: The initial step has to be started from the home page of Kodi. In the home page of Kodi, you can see many tabs which include videos, movies, programs, music, and much more. In these options, navigate to “System” tab and click on it.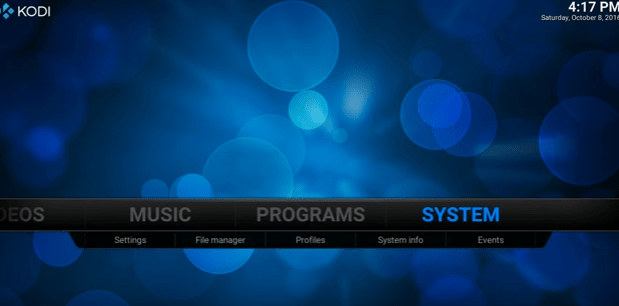
Step 3: Under the system, we have subtitles such as settings, file manager, profiles, and system info. But we need to select” File Manager.”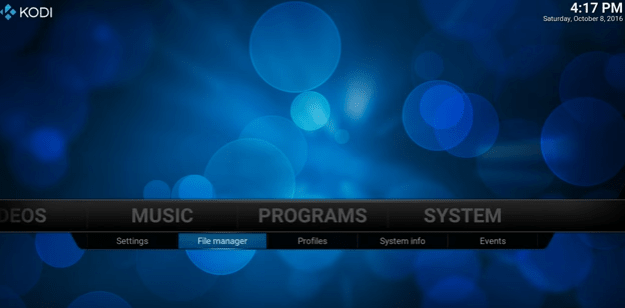
Step 4: Clicking the File Manager, it will open up the page as shown above. In this page, you have to go to the option called “Add Source” and click on it.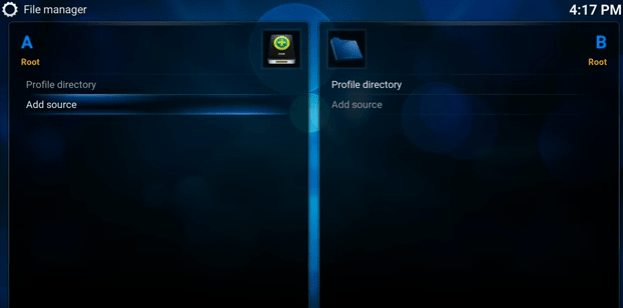
Step 5: Once you click the Add source option, it will open a dialog box to enter the name for the media source. In that, click on the first text box with default content “None.” Space is provided for entering the path for media location.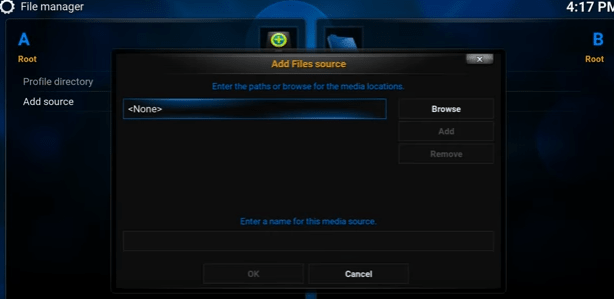
STEP 6: You need to just enter the link http://fusion.tvaddons.ag in the space provided. After you open the link, click the “Done” button at the bottom of the window.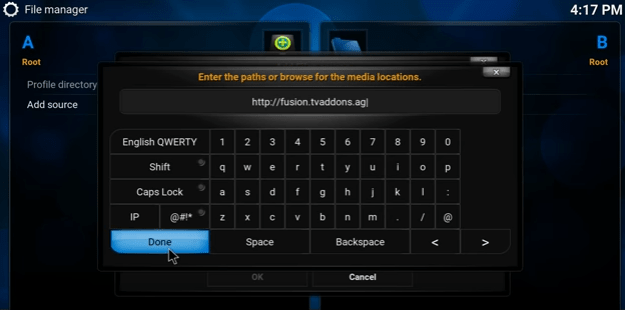
Step 7: Once you enter the URL in the media location space. Next, you have to navigate to the text space which is provided for giving the name of the media source. Here you can name the media source file according to your wish. Here, we name the media source file as “fusion.” After typing the file name, click “Ok” button at the bottom of the window.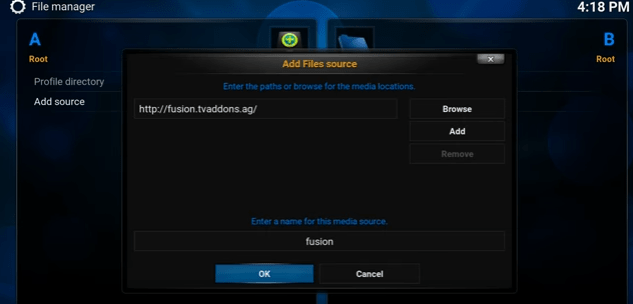
Step 8: Again click the main title “System.” This time we should select “Settings” subtitle.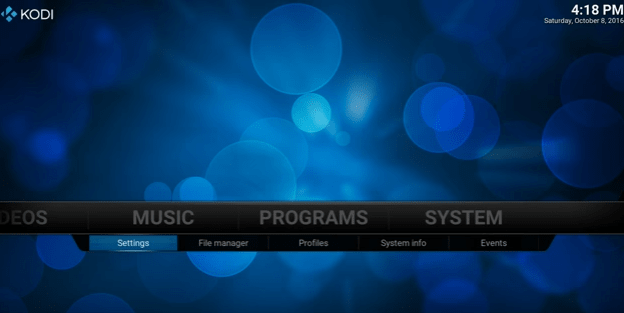
Step 9: In the Settings, we have “Change your settings.” Click “Add-ons” button.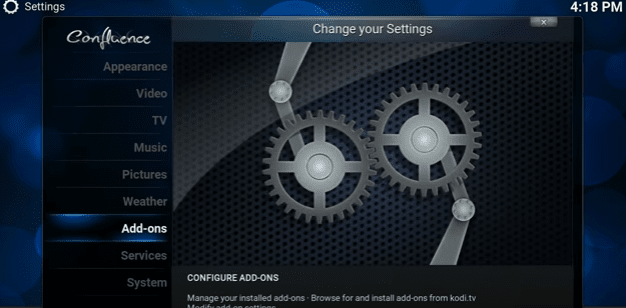
Step 10: After that, you could see this message box. Click “Ok.”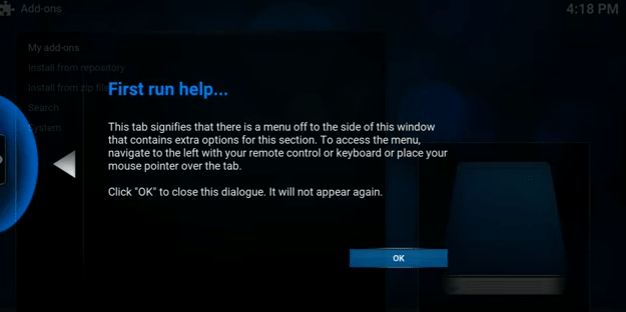
Step 11: Add-ons box will open. Select “Install from zipping file.”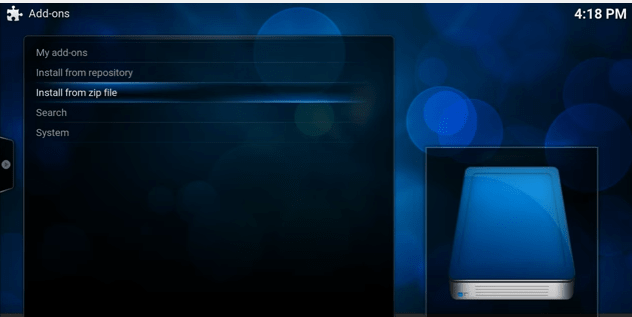
Step 12: When we click the zip file, you can see the list of media source files. Select “fusion” media source file which you have given.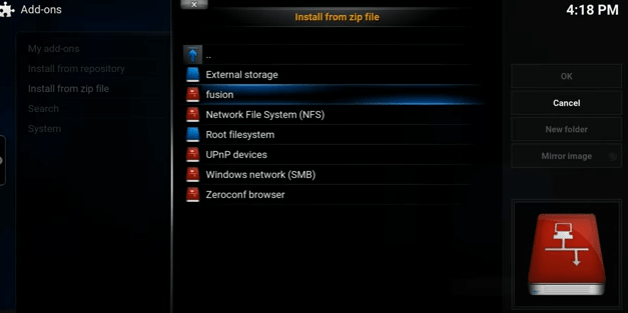
Step 13: After that, select “xmbc.repos” folder and click ok.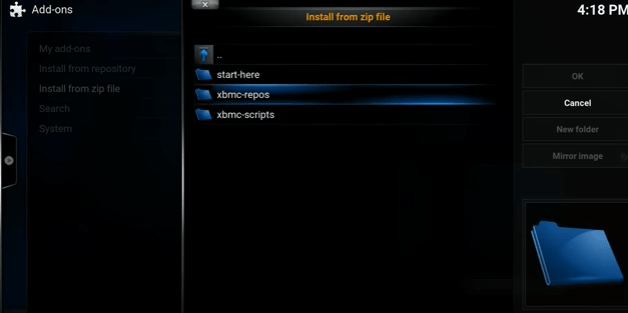
Step 14: From the xmbc.repos folder, select and click “English.”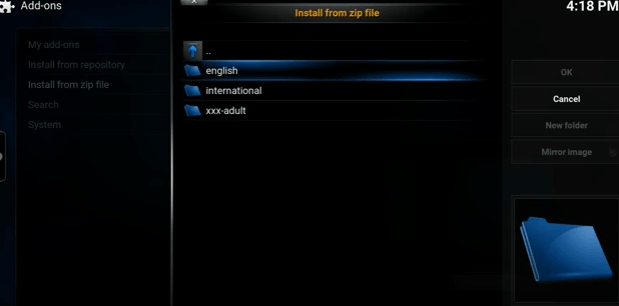
Step 15: There are many repositories available. Select “repository.jsergio1.0.2.zip” file.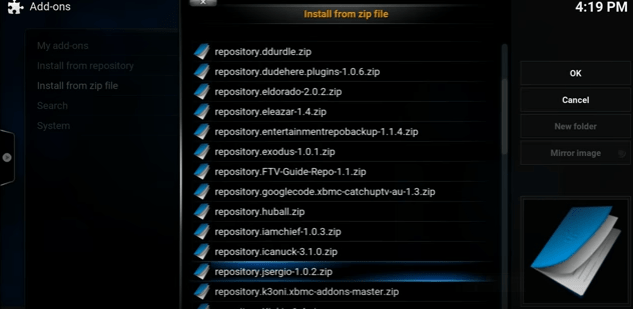
Step 16: Back to add-ons and select “Install from repository”.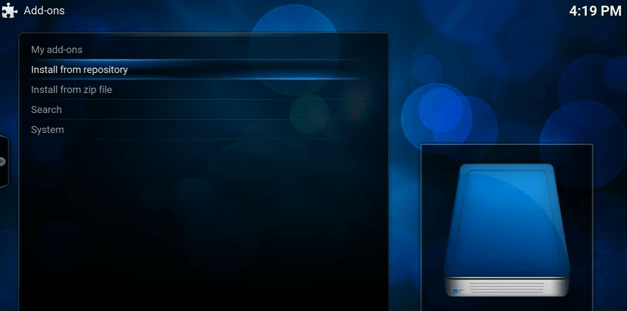
Step 17: In the repository, you could find “jsergio repo.” In the right side, you come to know about the details of the repo.
Step 18: In the jsergio repo, select “video add-ons.”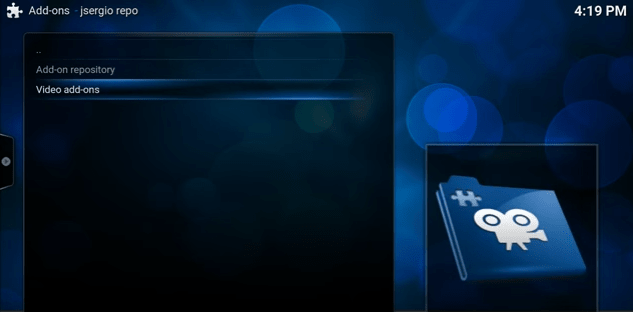
Step 19: Go for “Ororo TV.”
Step 20: Here the description about Ororo TV has given. Select “Install.”
Step 21: Ororo TV got “enabled and installed.”
Step 22: Go to Kodi main page, select “Videos” and then “Add-ons.”
Step 23: Select “Ororo TV.”
Step 24: To get into the TV, enter the “email address and password” which you have created in the beginning. Click email.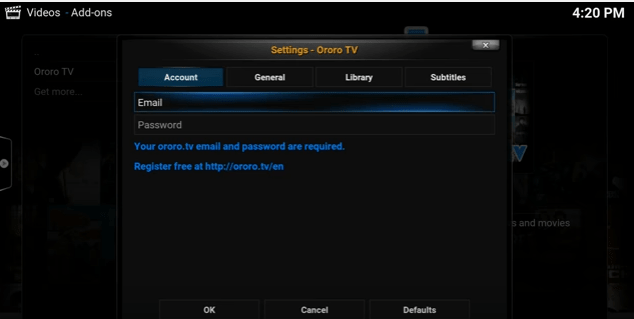
Step 25: Enter the email address and click “Done.”
Step 26: Next, choose password column and enter “password.”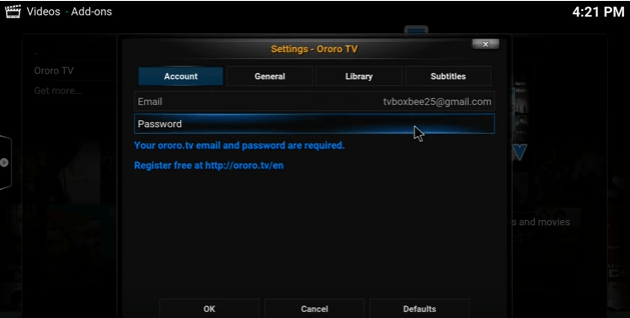
Step 27: Once you have given the email address and password, go back to Ororo TV.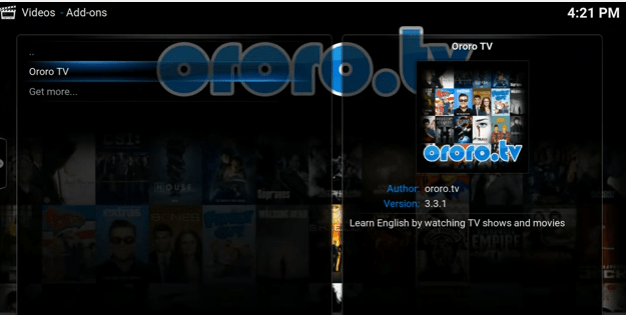
Step 28: On the TV, there are two sections namely, movies and TV shows.
Step 29: Navigate to “movies” in the Ororo TV and enjoy watching it.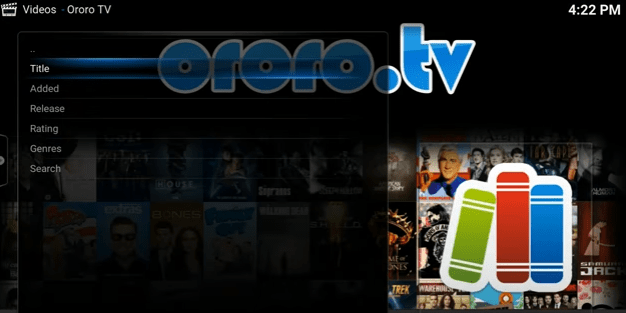
Step 30: Else choose “TV shows” and keep enjoying it.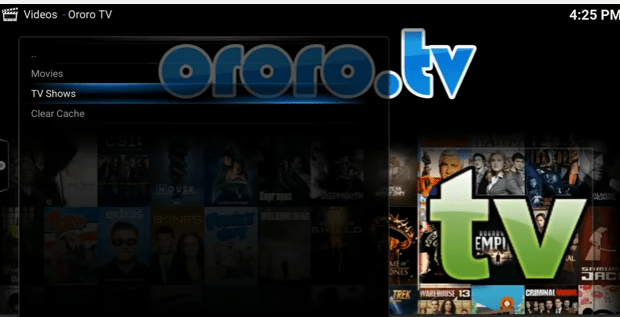
That’s all about the installation of the ororo tv kodi addon! If you got any issues with the installation then drop a comment below!
