
The Titanium build is one of the best kodi builds known to be widely popular for many fine reasons. It contains numerous numbers of add-ons which would satisfy the expectations of different vision people. One of the key benefits of this build is, it seems to possess simple navigation. Also, the widgets and backgrounds found in this build seem to work at a fine extent. Titanium build is known to be a solid all in all build. This build is known for its existence for a long time and regular updates. It seems to be occupying around 618 MB so make sure that storage capacity of your device is free to accommodate such quite big build.
Contents
ABOUT TITANIUM BUILD
This Titanium build is known to be a part of the Daily Update wizard. You can get the most number of most popular add-ons in this build. It contains sections like Movies, TV Shows, Live Sports, Replays of sports, and more. It also contains YouTube Sports and Kids zone too. More tabs on titanium build include Titan, Evolve, and UK Turk. In this article, we are going to provide the steps to install the titanium build on your kodi application. To install titanium build on kodi properly, follow each and every step carefully without skipping things.
How to install titanium build on kodi krypton 2017?
1.Tap on the settings icon at the top left of the home page of kodi krypton.
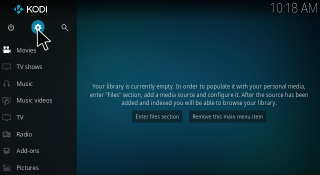 2. Then select File Manager from the list.
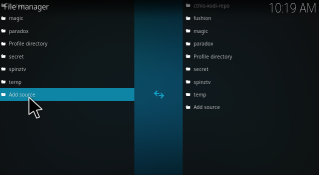
 3. Click on Add Source.
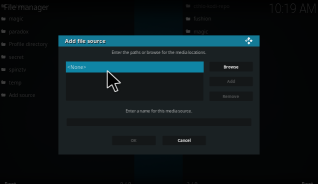
 4. Click on <None> to add the source location.
 5. Enter the path as http://repo.supremebuilds.com
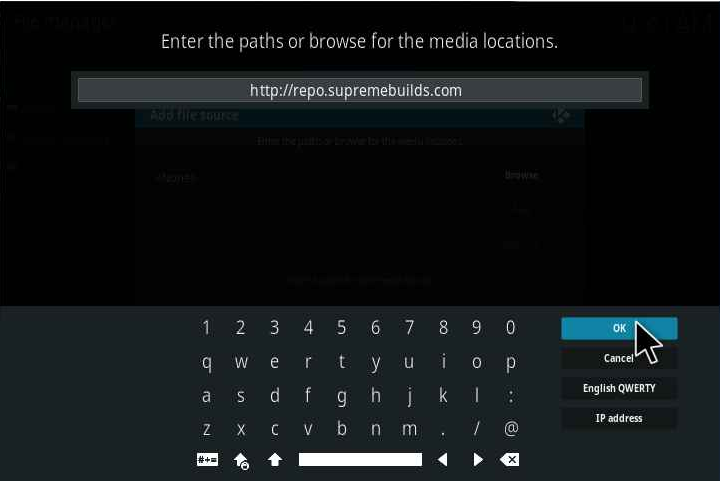
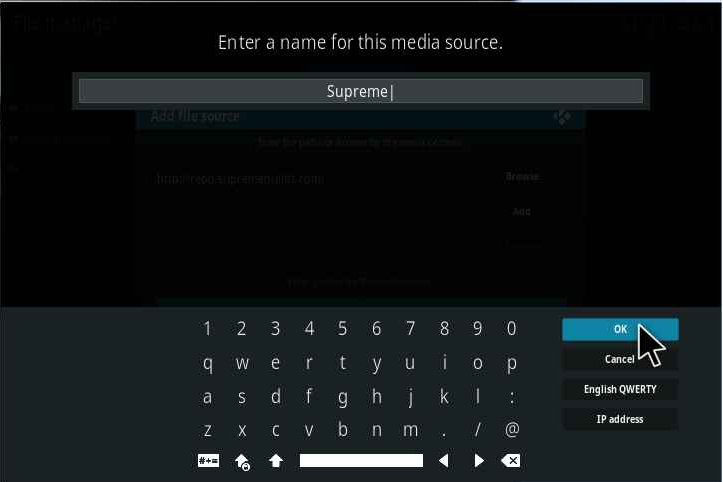
6. Then give a name for the media source. Here I have entered Supreme.
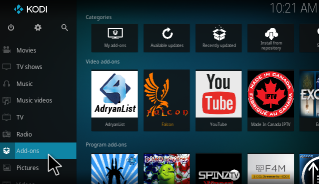
7. Get back to the homepage and click on Add-ons.
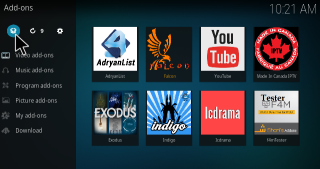
 8. Tap on the icon shown in the screenshot below.
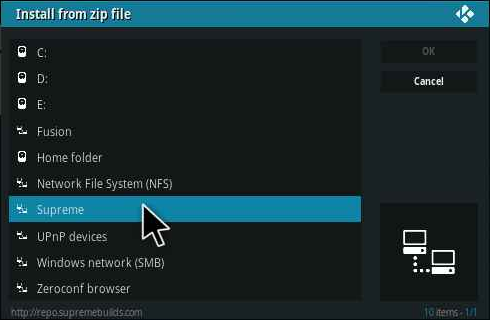
 9. Select “Install from zip file”
 10. Choose supreme from the list.
11. Next select repository.supremebuilds-1.0.0.zip.
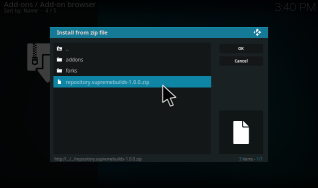 12. Now, wait for the zip file to get installed. You will find a notification about the installation from kodi.
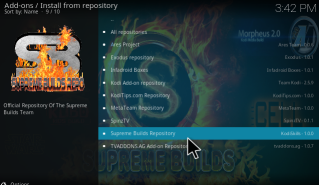
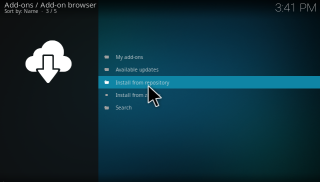 13. Next step is to install the repository. Click on Install from repository and select Supreme Builds Repository.
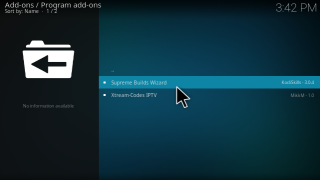
 14. Then go for “Program add-ons”
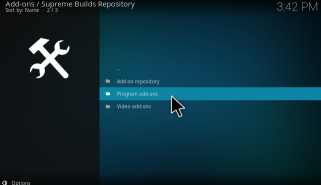 15. Choose Supreme builds Wizard.
 16. Finally, install this wizard.
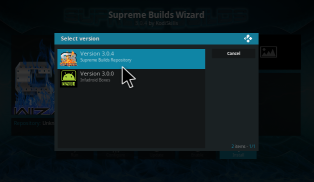
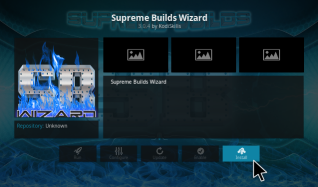 17. If you have multiple repos, which has the same wizard. It will ask you to choose the repo. Select the repo with the higher version.
 18. Then open the wizard to install titanium build.
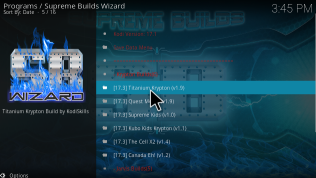
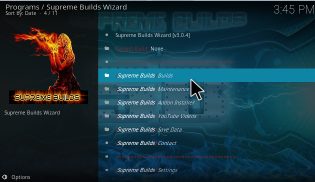 19. Select supreme builds from the list and then select Titanium krypton.
 20. There are two ways to install titanium build on kodi. One is the fresh install and other is standard install.
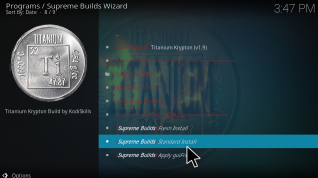 21. We would suggest the standard install. In the pop-up window select install.
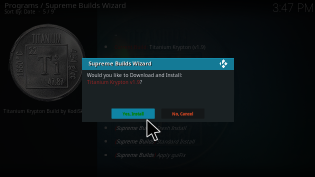 The titanium build will now be downloaded and installed.
How to install titanium build on kodi Jarvis?
- You need to start your box as normal and then open Kodi. The installation has to be initiated by clearing all the Data on the Kodi application created by the installation of wizards or builds. This step brings out the possibility of installing the wizard or build without any interruption as this build needs quite more space to get installed.
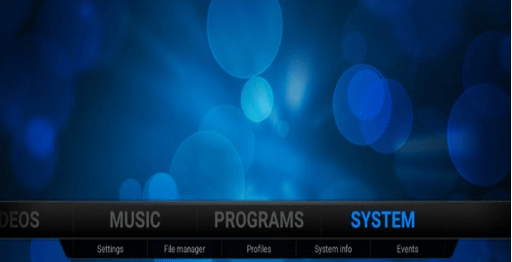
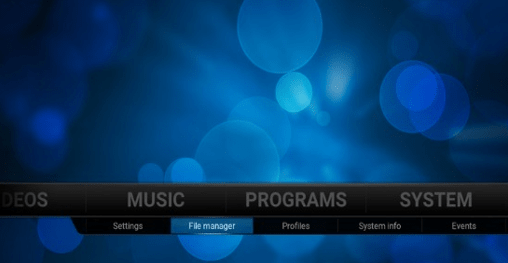
- Once you clean the data, go to the home screen of the kodi. In this screen, you could see a lot of tabs available. Each tab describes different functionalities like pictures, videos, etc. The Tabs which I have mentioned before is shown on the image illustrated above.

- In those tabs, the desired tab required for making out this process happen is SYSTEM tab. Thus, navigate to the System Tab. The process which I have stated above illustrated in the image.
- In the system tab, you can see more options like settings, file manager, profiles, system info, and events. In these options, just go on to the ‘FILE MANAGER’ option.
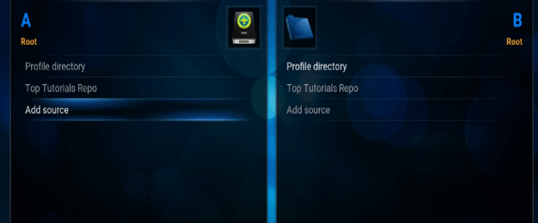
- Once you click on the file manager options found in system tab you will get the screen as shown in the image. This is the file manager page of the kodi application.
- In the file manager page, you can see the option ADD SOURCE on the left side of the screen. You need to click on that option. By clicking that option will bring out another screen as if the image above.
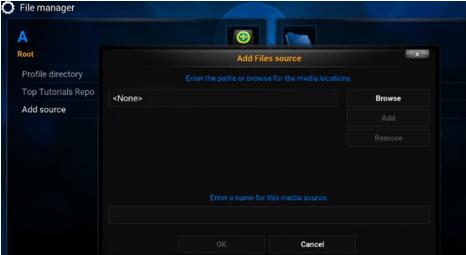
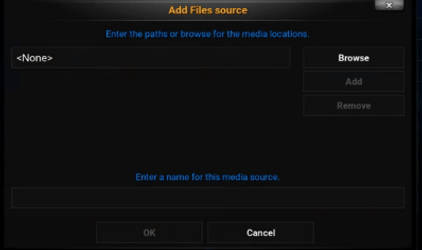
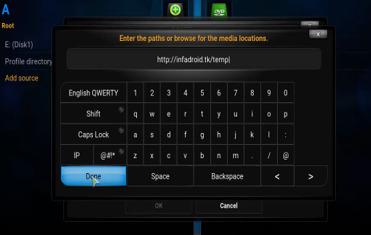
- The screen which I have mentioned is the Add source file prompt box. It contains two fields namely the first one is for entering the link to add file source and the second one is to give a name for the file source.
- In that dialogue box, first of all, you need to select the ‘none’ in that. When you click that, it will prompt you to enter the paths to browse out the media locations. In that, type http://infadroid.tk/temp in the field provided. After that click the ‘Done’ virtual button you can find in there.
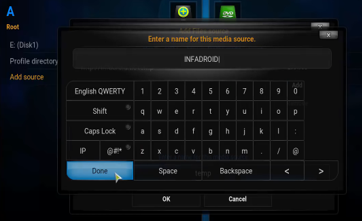
- After entering the link and clicked done, it will ask you to type a name for the link you have provided previously. So, in the Name field, clicking it will give out options to enter the name. Using this virtual keyboard, you have to type the desired name. We have given the name as INFADROID. Once given, click done and click OK.
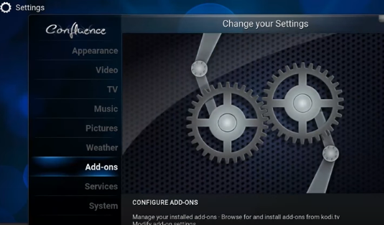
- Once you typed the name and clicked ok, you can come out and go on to the settings option which you can find in the Systems tab which is mentioned in a previous step. Once you click to open the settings options it will bring out a screen as the one mentioned in the image. In that, go to the Add-ons tab found in the list bar.
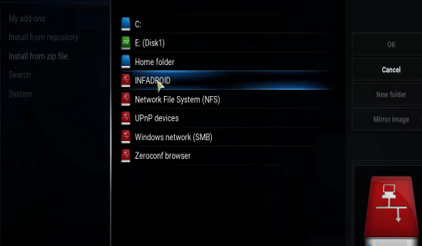
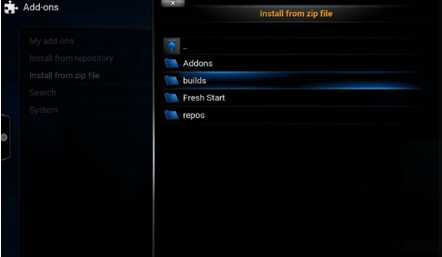
- Once the Add-ons tab is clicked, it will take it to a screen illustrated above. In that screen, you can find tabs like ‘my add-ons’, ‘Install from repository’, ‘install from zip file’, and more. Just navigate to the tab Install from zip file.
- By clicking on the ‘Install from zip file’, it will open up a menu containing multiple tabs containing the drives and much more. In those tabs, just click on the “INFADROID” which we have added before.
- When you open “INFADROID” it will open up the folder which contains hence more folders like Addons, builds, Fresh Start, and repos. In that list, just click open the builds folder as shown in the image.
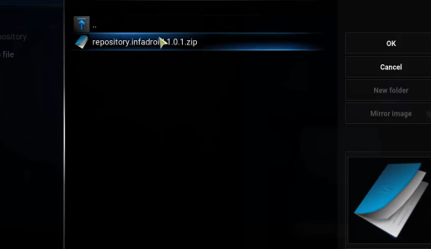
- By opening the builds, you can see one zip file namely “repository.infadroid-1.0.1.zip”.You have to open the file “repository.infadroid-1.0.1.zip” and click OK.
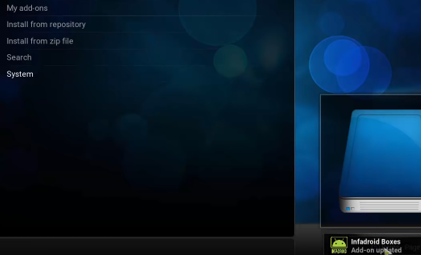
- Once you click opened the “repository.infadroid-1.0.1.zip” file in the builds folder, you can see a pop-up message as if shown in the above image. You can see this pop-up message indicator at the right bottom of your screen.
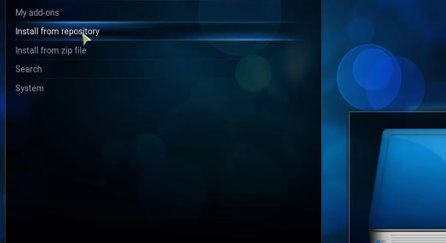
- After seeing the pop-up message as shown in the image of the previous step, go to the option “Install from repository” which you can see in the image shown above.
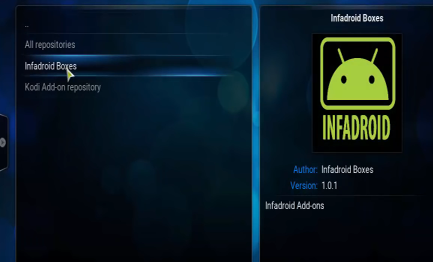
- Once you open the option mentioned in the previous step, you will get the screen as if shown in the above image. In this screen, you may see “All repositories”, “Infadroid boxes”, and “Kodi Add-on repository” options. In that, click on the Infadroid Boxes.
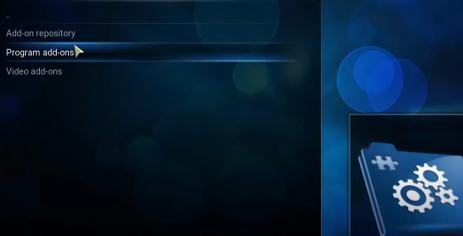
- In the Infadroid Boxes, you could see around three options as shown in the image, in those options, click on the Program add-ons option which you could see it as the second option in the list.
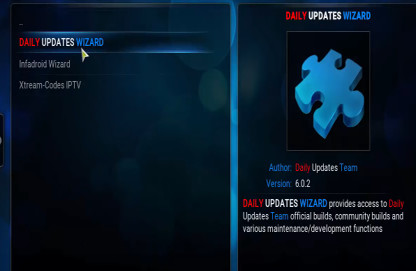
- Clicking on the Program add-ons option will open up a screen as shown in the image. In this screen, in contains multiple entries of options. In that, click on the DAILY UPDATES WIZARD option.
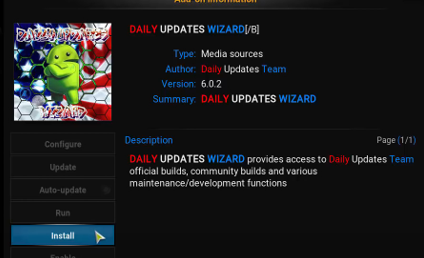
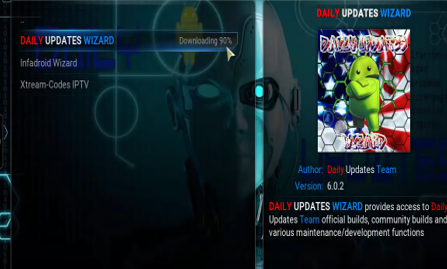
- Once click on the update wizard mentioned in that screen, it will open up a screen as if the one shown in the above image. In that, click on the Install option mentioned in the bottom list.
- Next you click on the install option, you can see the DAILY UPDATES WIZARD being downloaded. The Downloading status is pointed out in the image shown.
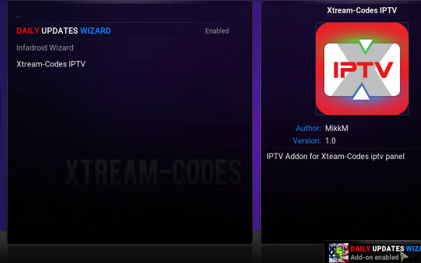
- After download gets over, it shows a pop-up message as shown in the image. It notifies that DAILY UPDATES WIZARD is got enabled.
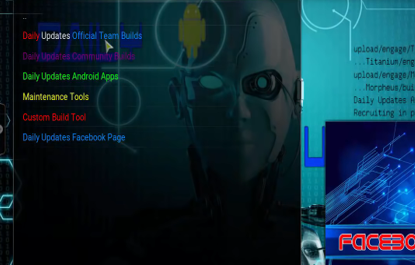
- Now go to the Home of Kodi and select Programs tab. In that, you can see the DAILY UPDATES WIZARD. When you open that, you can see the screen as if shown in the image. In that, click on “Daily Updates Official Team Builds”.
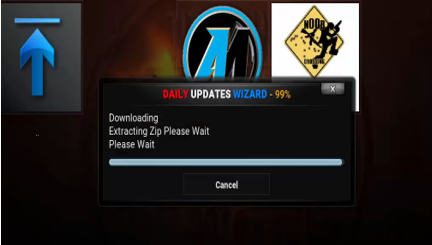
- Now you could find titanium, noob, etc. Click on the Titanium icon. It will initiate the download the zip file of the build. It may take few minutes to happen.
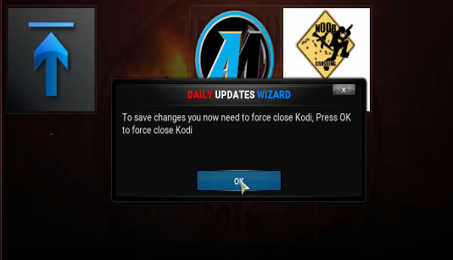
- Once the downloading and the extraction process gets over, it will prompt you to force close the Kodi. By clicking on the OK button will shut down Kodi.
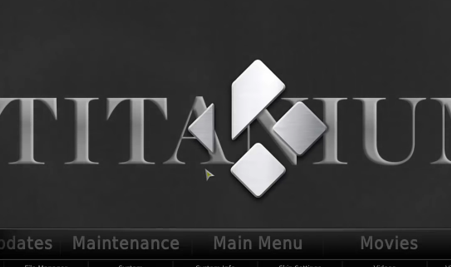
- Once you close Kodi and restart Kodi, you could see the stuff as shown in the image. Yes, the build got installed successfully on your kodi.


TITANIUM BUILD NOT WORKING ERROR & FIX:
PROBLEM:
Many of the Kodi users using Titanium Build still complaint on the issue of getting the error while they update the Titanium build on Kodi. It seems that Kodi Titanium is not working properly for many of the users.
SOLUTION:
It is advised to the Titanium users to kindly clear out the data present in Kodi Completely. Once you wipe out completely, you need to install the daily updates repo and the wizard too. After doing this process, you need to install titanium freshly. This process would bring out the updating process without any error occurrence.
HOW TO CLEAR DATA IN KODI ON ANDROID DEVICE:
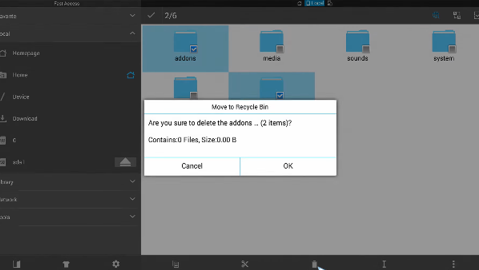
. Open ES FILE MANAGER > Android > data > org.xbmc.kodi > files > .kodi > select Addons and userdata folders and click delete. This will clear the data on kodi. (Note: ‘.kodi’ is a hidden file, make sure the visibility of hidden files is in ON state)
I hope you all enjoyed the article. If you still find any issues in the installation of titanium build on kodi then do drop a comment below!
I read all the instructions and even followed along with a Youtube video while installing. For Step 24, I run into an issue. Titanium icon does not show up. No other icons show up either to select. Could I have missed something?
We have updated the new kodi repository url for titanium. Please do check it! If you have any further issues feel free to ask 🙂
I was able to install the build successfully however there are no backgrounds showing only a blank black screen. Can you help please. Thank you.
Getting the following error when I click standard install (this is whils doing a fresh Kodi install followed by wizard install): “build install: invalid zip URL”… can anyone help with this?
do try this url for installing titanium build: http://supreme.srve.io/repo/
Didn’t work. Still invalid url
I got the same error message
I am trying to install unto my Jarvis system. However, when I go to install the Daily Updates Wizard, the installation fails every time. What do I do?
Do let us know what issue you face while installing?
Won’t let me install DUW Jarvis on 16.1. Says installation failed when installing from repository
I suggest you to update to kodi 17.3
AUDIO ISN’T ENGLISH
Do the servers close at a certain time? Seems like after like 8pm they don’t want to download properly! It like the servers close at a certain time or somthing. I have no problems during the day.
It varies from country to country sir. I haven’t faced such server issues so far. Did you exceed that 4 hours threshold?
Can not connect to repository after zip successfully installed. It’s 9:15 pm EST. I have been trying for 30 minutes, exiting in and out of Kodi. Turning VPN on and off. Baffled.
which source URL did you enter?
I downloaded v2.4 and it says my current build is titanium v2.4, but it is still the default kodi, does not should the titanium when after kodi loads. What am I doiing wrong?
i am loading onto android jarvis 16.1 and as with several other repos i get to install from repositary get all the information as your guides show hit the button and a check box says unable to connect to repositary. after back tracking i can find that the file is enabled what am i missing
Hi I’m having a problem with titanium, on start up of kodi I have an ominous kinda sound and then the main screen shows falling snow? Not an expert but can follow instructions
I have kodi 17.6 & have installed titanium. some days it works and others it will pull up movie & show over 100 sources but it won’t load it just keeps cycling through all the sources
I have updated to current version of titanium build and find that keyboard doesn’t allow to select letter unless changing to mouse mode. Also you can’t see which word link the mouse is currently on when scrolling in normal mode.
Please advise a fix as I love this build and previous version but it has to be usable in order to keep.
Thank you in advance.