
INSTALLING HYPER TT BUILD ON KODI
ABOUT HYPER TT BUILD:
Hyper TT build is one the famous build in Kodi that has the nice collection of Add-ons in it. Hyper TT build has all the good working Addons, nice sections, and good interface. You will find all the good working streams on the main screen of Kodi under particular sections and some of the popular Addons have made their own sections.
Hyper TT is available with all possibilities pre-loaded and it’s perfect for the Firestick and obviously suitable for all other devices too.
Requirements:
It is suggested to use VPN while you are using Kodi Stream. It is known that a VPN would preserve the secrecy of your activities online and protects from spying ISPs. It is personally recommended to use IP Vanish VPN. It enables you to access every Kodi Add-ons and it can be supported in multiple devices like computer and mobile devices. The key factor if it is, it provides privacy in complete scale. This is in regard to safeguarding your privacy on your online activities as the probability of Online fraudulent actions are very increasing nowadays.
How to install hyper tt build on kodi?
- Start your box as normal and then go into Kodi. The First step of the installation has to be initiated by clearing all the Data on the Kodi previously we install any Wizard or Build on your Kodi. This step would make the possibility of installing the wizard or build without any interruption.
 After cleaning the data, Open Kodi application in the device in which it is got installed. After opening the Kodi application you could see the page as same as the image shown above. In this screen, you could see a lot of tabs available which describes the different functions to each tab. The Tabs you could see in this screen includes Pictures, Videos, Music, Program, and System.
- The important tab which we require to initiate this process is the SYSTEM tab. So, navigate the cursor towards the System Tab. The above image illustrates the screen which you would see when you click on the system tab.
- In the system tab, you can see more options like settings, file manager, profiles, system info, and events. In these options, just go on to the ‘FILE MANAGER’ option.
- Once you click on the file manager options found in system tab you will get the screen as shown in the image. This is the file manager page of the kodi application.
- In the file manager page, you can see the option ADD SOURCE on the left side of the screen. You need to click on that option. By clicking that option will bring out another screen as if the image above.
- The screen which I have mentioned is the Add source file prompt box. It contains two fields namely the first one is for entering the link to add file source and the second one is to give a name for the file source.
- In that dialogue box, first of all, you need to select the ‘none’ in that. When you click that, it will prompt you to enter the paths to browse out the media locations. In that, type http://toptutorials.co.uk/kodi/builds/ in the field provided. After that click the ‘Done’ virtual button you can find in there.
- Once you click on DONE, it will prompt you to give a name for the file. In that, you can type out the name you wish but in here we are giving it as ‘Topt’ and click OK.
- Once you typed the name and clicked ok, you can come out and go on to the settings option which you can find in the Systems tab which is mentioned in a previous step. Once you click to open the settings options it will bring out a screen as the one mentioned in the image. In that, go to the Add-ons tab found in the list bar.
- Once the Add-ons tab is clicked, it will take it to a screen illustrated above. In that screen, you can find tabs like ‘my add-ons’, ‘Install from repository’, ‘install from zip file’, and more. Just navigate to the tab Install from zip file.
- By clicking on the ‘Install from zip file’, it will open up a menu containing multiple tabs containing the drives and much more. In those tabs, just click on the “Topt” which we have added before.
- When you open “Topt” it will open up the folder which contains hence more folders like Addons, builds, Fresh Start, and repos. In that list, just click open the builds folder as shown in the image.
- By opening the builds, you can see one zip file namely “plugin.video.hyper1.0.2.zip”.You have to open the file “plugin.video.hyper1.0.2.zip” and click OK.
- Once you click opened the “plugin.video.hyper1.0.2.zip” file in the builds folder, you can see a pop-up message as if shown in the above image. You can see this pop-up message indicator at the right bottom of your screen.
- After you get the pop-up message, on the Add-ons page, navigate to the MY ADD-ONS. In My add-ons, go to the program add-ons.
- Once you open that, you can see two options. In that click the “HyperTT Wizard”.
- Once open the “HyperTT Wizard”, it will open the screen as if the image shown above. In that, navigate to the Open options in menu provided. Click the open options to open the Hyper TT wizard.
- Once open the Hyper TT wizard, it will bring out the screen shown above. We would prefer you to click on the first option in two listed options.
- This makes the downloading of the HyperTT wizard. Once it is downloaded and extracted, you need shutdown the system if you’re using the computer or you need to disconnect the device if you’re using android boxes.
- Once the system is restarted, you can find the Hyper TT build opened. The skin of the Hyper TT build would look like the image illustrated above.
 After cleaning the data, Open Kodi application in the device in which it is got installed. After opening the Kodi application you could see the page as same as the image shown above. In this screen, you could see a lot of tabs available which describes the different functions to each tab. The Tabs you could see in this screen includes Pictures, Videos, Music, Program, and System.
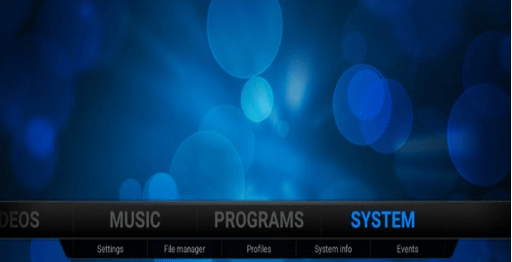 The important tab which we require to initiate this process is the SYSTEM tab. So, navigate the cursor towards the System Tab. The above image illustrates the screen which you would see when you click on the system tab.
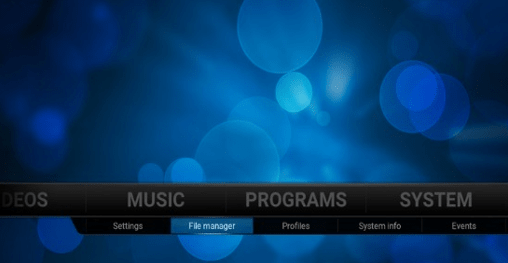 In the system tab, you can see more options like settings, file manager, profiles, system info, and events. In these options, just go on to the ‘FILE MANAGER’ option.
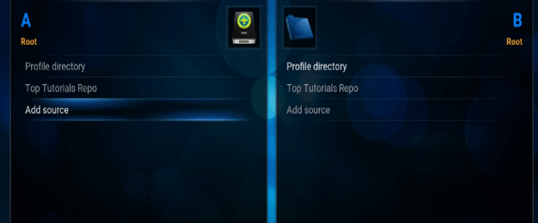 Once you click on the file manager options found in system tab you will get the screen as shown in the image. This is the file manager page of the kodi application.
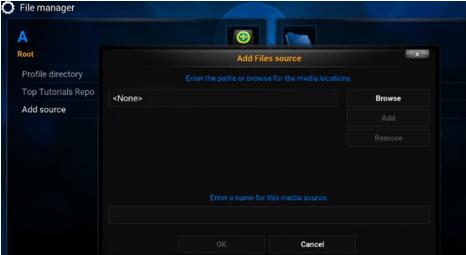 In the file manager page, you can see the option ADD SOURCE on the left side of the screen. You need to click on that option. By clicking that option will bring out another screen as if the image above.
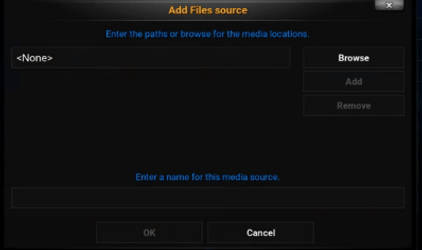 The screen which I have mentioned is the Add source file prompt box. It contains two fields namely the first one is for entering the link to add file source and the second one is to give a name for the file source.
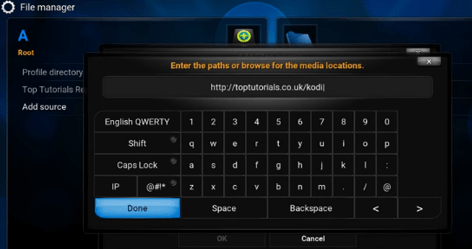 In that dialogue box, first of all, you need to select the ‘none’ in that. When you click that, it will prompt you to enter the paths to browse out the media locations. In that, type http://toptutorials.co.uk/kodi/builds/ in the field provided. After that click the ‘Done’ virtual button you can find in there.
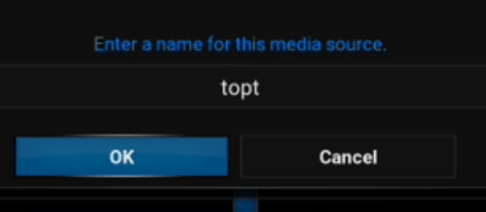 Once you click on DONE, it will prompt you to give a name for the file. In that, you can type out the name you wish but in here we are giving it as ‘Topt’ and click OK.
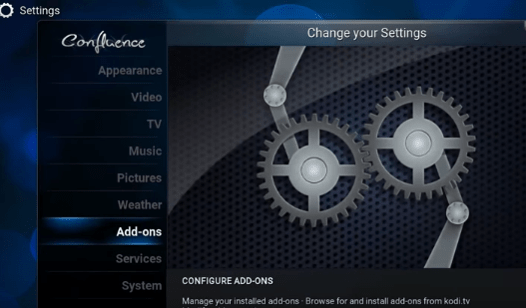 Once you typed the name and clicked ok, you can come out and go on to the settings option which you can find in the Systems tab which is mentioned in a previous step. Once you click to open the settings options it will bring out a screen as the one mentioned in the image. In that, go to the Add-ons tab found in the list bar.
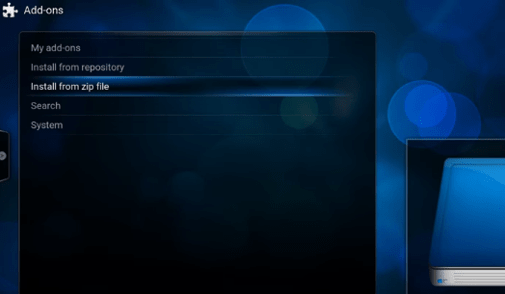 Once the Add-ons tab is clicked, it will take it to a screen illustrated above. In that screen, you can find tabs like ‘my add-ons’, ‘Install from repository’, ‘install from zip file’, and more. Just navigate to the tab Install from zip file.
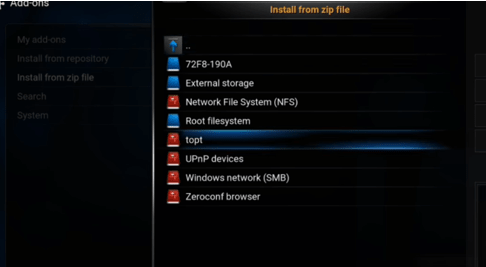 By clicking on the ‘Install from zip file’, it will open up a menu containing multiple tabs containing the drives and much more. In those tabs, just click on the “Topt” which we have added before.
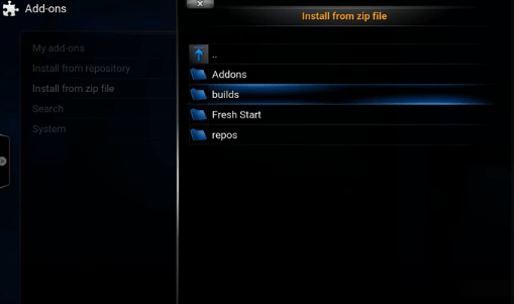 When you open “Topt” it will open up the folder which contains hence more folders like Addons, builds, Fresh Start, and repos. In that list, just click open the builds folder as shown in the image.
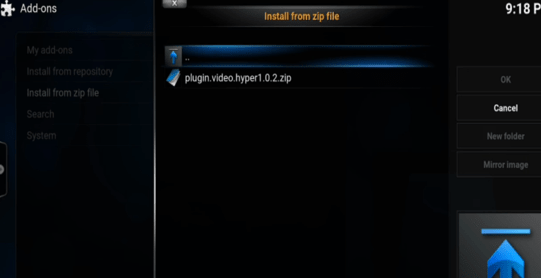 By opening the builds, you can see one zip file namely “plugin.video.hyper1.0.2.zip”.You have to open the file “plugin.video.hyper1.0.2.zip” and click OK.
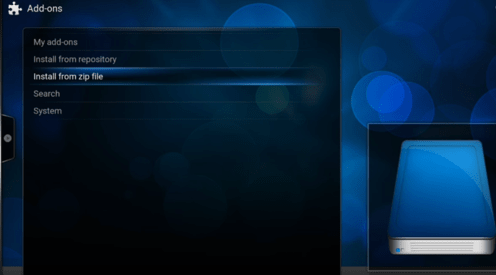 Once you click opened the “plugin.video.hyper1.0.2.zip” file in the builds folder, you can see a pop-up message as if shown in the above image. You can see this pop-up message indicator at the right bottom of your screen.
 After you get the pop-up message, on the Add-ons page, navigate to the MY ADD-ONS. In My add-ons, go to the program add-ons.
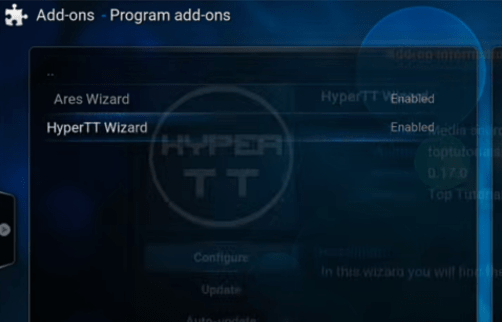 Once you open that, you can see two options. In that click the “HyperTT Wizard”.
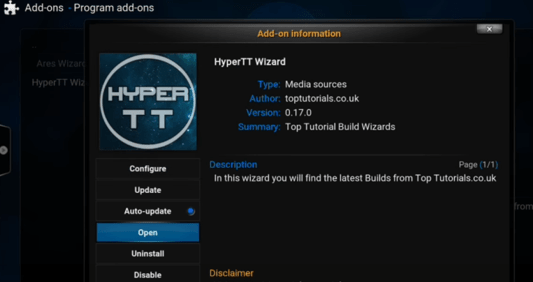 Once open the “HyperTT Wizard”, it will open the screen as if the image shown above. In that, navigate to the Open options in menu provided. Click the open options to open the Hyper TT wizard.
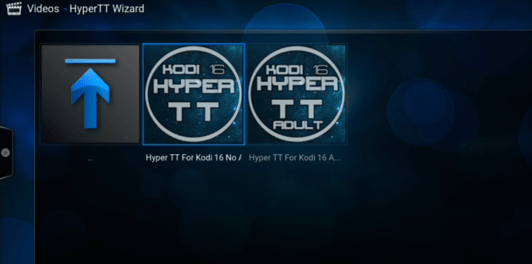 Once open the Hyper TT wizard, it will bring out the screen shown above. We would prefer you to click on the first option in two listed options.
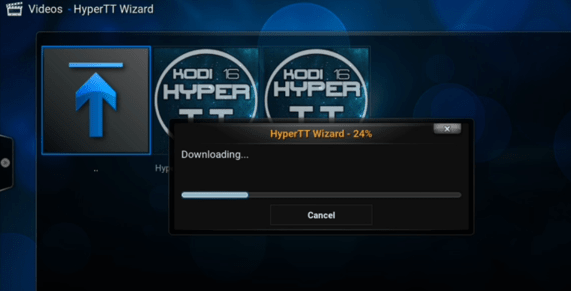 This makes the downloading of the HyperTT wizard. Once it is downloaded and extracted, you need shutdown the system if you’re using the computer or you need to disconnect the device if you’re using android boxes.
FEATURES OF HYPER TT BUILD:
Amazing features and advantages of fully loaded with Hyper TT Build
- Live TV from anywhere in the world
- Any TV series on demand
- Any movies on demand
- All major LIVE sports including 3 PM
- Full replays of sports events
- Kids Sections and cartoons
- 24 hours show
(Note: This Build is not associated with kodi.tv and is a third party Kodi Build. Please don’t post any question related to this Build on official Kodi forum (forum.kodi.tv).
Feel free to leave a comment in case of any clarifications and issues.
